Signs That Your Water Heater Needs Replacement

Water heaters are designed to last many years, but factors like hard water and natural gas can shorten their lifespan. Knowing the tell-tale signs that your water heater needs replacement will help you prepare for a smooth transition.

Water Heater

If your hot water smells like garlic or appears discolored, call the experts at Hot Water Heater Replacement Denver immediately. This could be an indication of a broken thermocouple or gas control valve.

If you’re noticing that your hot water tank isn’t heating or isn’t providing as much water as it once did, it may be time to consider replacing your thermostat. This is a common problem and usually the result of one of two issues. The first, and most obvious is that the water heater was improperly sized for your home. In this case, it’s best to just replace the unit with a larger one.

Another issue is that your thermostat might simply be set on the wrong temperature setting. The thermostat’s purpose is to control the heating element inside the heater so that it heats the water according to your desired temperature settings.

This is done by a bimetallic strip that expands and contracts based on temperature. When the metal reaches a certain temperature, it triggers an electric circuit that controls your heating element. Most modern thermostats have a digital display showing the current temperature and the current setting. Some also have a clock and day of the week settings.

If your thermostat is old and outdated, you might want to consider upgrading it to a smart version. While these aren’t typically as inexpensive, they tend to be much more energy efficient and can help you save on your electricity bill. Smart thermostats can be adapted to work with your existing heating and cooling system as well as your smart devices.

Thermostats need to be located in a place where they can get a full range of ambient temperature. They should not be placed in direct sunlight, near a window or door, or above air vents, as these can cause them to read incorrectly. Additionally, they shouldn’t be placed where steam might reach them as this can affect the operation of the thermostat.

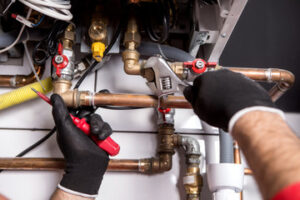
Before beginning any repairs on your hot water heater, you should always shut off the gas supply to the unit by turning the valve on the nearest union a quarter turn. You should also disconnect the tank from the plumbing by unscrewing the connecting pipe with a pipe wrench and draining any water that remains in it. Lastly, you should remove the old unit and dispose of it properly.

Element

The element is the component that keeps water hot in your tank. It’s one of the most commonly replaced parts in hot water heaters and can be very expensive if you have to replace it. Luckily, it is relatively easy to repair.

To begin with, disconnect the two circuit wires attached to the element. Then, with a non-contact circuit tester, test for power. If you get a reading of 0 on the circuit tester or the needle doesn’t move, then the heating element is faulty and needs to be replaced.

Next, shut off the electric power to the water heater by turning off the breaker that goes to it. If you don’t know which breaker it is, then shut off the entire home’s electricity to be safe. After the power is off, drain the tank by opening the drain valve at the bottom of the water heater. It may take a while for the tank to completely drain.

Now it is time to remove the old element. When you are done, make sure to save the screws in a safe place so that you can put them back on when you install the new one. Before installing the new element, it is important to clean the threads and gasket area of the tank. It is also a good idea to wipe down the element itself and remove the “O” ring that seals it in the tank.

Then, screw the new element into place and tighten it. Be sure to use a socket wrench for this step. After that, it is a good idea to close the water heater drain and run a hot water tap in your kitchen for three minutes. Finally, reconnect the black and white wires to the element by wrapping them around the screw terminals in a clockwise direction.

If you are replacing an element, be sure to buy the same wattage as the original. If you do not, your new element will burn out quickly. Also, be sure to buy a high watt density element. These are less prone to rust than lower watt density elements and are typically the least expensive option.

Anode Rod

An anode rod is a long metal rod that runs down the center of your water heater tank. It’s made from aluminum, magnesium or zinc wrapped around a steel wire core. The purpose of an anode rod is to corrode more easily than your water heater, so that if you have mineral deposits in your water, they will corrode the rod instead of your hot water tank. This helps keep the inside of your water heater tank free of rust and corrosion. An anode rod is not permanent, and it will need to be replaced periodically.

The type of anode rod you use will determine how long it lasts. Magnesium is the most popular, but it tends to corrode quickly, especially if you have hard water. Aluminum rods are a good choice for most conditions, and they will usually last longer than magnesium ones. If you have extremely hard water, however, you may want to consider using a zinc-aluminum alloy rod. These will last longer than aluminum, and they can be less expensive than magnesium.

As the anode rod corrodes, it produces an aluminum oxide deposit that sometimes makes its way into your hot water tank and faucet aerators. This odorless gel substance can vary in consistency from a firm somewhat sticky curd to a thick running slurry. If you notice this deposit when cleaning out your faucet aerators, it is likely time to replace your anode rod.

When it’s time to replace the anode rod, first shut off your water heater and the hot water outlet on your water heater. Drain several gallons of water from the hot water tank. Then, remove the hex head on top of the water heater. This can be difficult if the rod is stuck from rust, and you may need to use spray lubricant. Once the hex head is removed, you can pull out the rod and examine it for signs of corrosion.

It’s recommended that you replace your anode rod once it reaches the bottom of the tank or when it is corroded beyond repair. A new anode rod will help protect your water heater from rust and prevent damage to the internal components, saving you money on repairs down the road.

Dip Tube

A dip tube performs a vital function in your hot water heater. It directs incoming cold replacement water to the bottom of your tank where it gets heated. Without the dip tube, cold water would mix with the hot water at the top of your tank and you would end up with tepid water for faucets and appliances. The dip tube is an unsung hero of the water heater.

The modern plastic dip tubes in most water heaters can be expected to last about a decade but they do sometimes break. They are often corroded by the minerals in hard water. The resulting erosion can cause the dip tube to lose its seal and allow leaking water to escape. When the dip tube breaks, it will no longer be able to transfer water from the inlet port to the bottom of the tank where it is heated. Cold water will mix with the hot water and the temperature of the water will drop.

Fortunately, replacing the dip tube is a relatively simple task and one that most people can handle on their own. First, you will need to shut off the power to the tank by switching off the circuit breaker. It is also a good idea to drain the tank and disconnect it from the hot water piping. You will need a pipe wrench to remove the inlet port nipple and a flat screwdriver to loosen the dip tube.

There are several different kinds of dip tubes available, from the basic flanged type to a special self-cleaning design that helps keep sediment out of your tank. Whichever one you choose, it should be cut to length before you install it. The tube should be positioned so that it is under the inlet port but above the burner at the bottom of the tank.

How to Properly Install and Maintain a Backflow Prevention Device

Backflow prevention devices protect public health by isolating cross-connections and protecting drinking water. Many towns and cities require homes and businesses to have backflow preventers installed and tested.

backflow installation

This backflow installation process involves working in areas that are considered confined spaces and requires specific training to perform safely. Backflow assembly testing is a significant source of income for plumbers. Visit https://www.plumbing-express.com/ to learn more.

Backflow is when a backward flow of water, or other substances, enters the potable drinking supply. The reason this is a problem is because the water could be contaminated with hazardous chemicals or bacteria. Backflow can also cause serious damage to plumbing pipes. Thankfully, it’s possible to protect your home or business from backflow events by installing a backflow prevention device.

There are two main kinds of backflow: back pressure and back-siphonage. Back pressure backflow is the most common type of backflow. It happens when a higher-pressure system or appliance creates more pressure than the local water distribution lines can handle. This can be caused by things like a water main break, a fire hydrant being opened for use in your neighborhood, or even the simple act of someone flushing a toilet in the next room. This difference in pressure causes the water to be pushed backwards into your house’s plumbing systems, and can potentially contaminate your water supply.

While backpressure backflow is not a major concern, back-siphonage is. This backflow occurs when a lower-pressure area pulls higher-pressure water into it. This is the most dangerous kind of backflow, and can happen in your household if you have a drain in a basement that goes directly into your sewerage system, or if you have a septic tank and irrigation system connected to it. Back-siphonage can draw sewage, oil, and other dangerous substances into your drinking water supply, and can also lead to backflow of scalding hot water into your household drains.

Luckily, many modern plumbing fixtures have built-in backflow protection. For example, most toilets have a sensor that can detect if the water is flowing in the wrong direction. This will trigger a safety valve to close, preventing the toilet from filling up and overflowing. However, older plumbing fixtures may not have this feature, or it might be disabled.

It’s important to have your backflow preventer inspected annually to ensure it is working properly. You should also have it repaired or replaced as needed. If you do need to have your backflow preventer repaired or replaced, it’s important to work with a licensed backflow contractor. A backflow certified tester will be able to test your backflow preventer and make sure it’s in good working order.

Why do I need a backflow preventer?

Backflow prevention is an important part of your home’s plumbing system, as it ensures that dirty or polluted water doesn’t enter your clean water supply line. Without it, sudden changes in water pressure can reverse flow and mix dirty water with your home’s potable water. This contaminated water could contain lead, copper, chromium, chemicals, pesticides and other debris that are not meant for your drinking water.

While it’s tempting to try DIY backflow preventer installation, this is one project best left to professional plumbers. It requires a good understanding of your home’s piping system and the proper equipment to make sure the device is installed correctly. Choosing to go with a professional is an affordable and safe choice that can help protect your family from potentially costly waterborne disease outbreaks.

If you have a new irrigation system that isn’t connected to your JEA irrigation meter, a private fire sprinkler system, or a boiler system on your property, it’s likely your city requires you to have a backflow preventer in place. Likewise, if you have an outdoor pool or pond that is connected to your home’s water system, your backflow preventer needs to be properly installed and tested.

The cost of a backflow preventer installation varies by city, but the average homeowner pays between $135 and $1,000. Most cities also require that you obtain a permit to install the device. It’s always a good idea to consult your local permits and regulations before starting the project on your own.

Investing in a backflow preventer is an easy sell to most homeowners. Compared to other potential home renovations, backflow preventer installation is affordable, quick and safe. It’s also a crucial investment in the safety of your family and neighbors.

If you’re not convinced, consider how many waterborne diseases are caused by backflow every year. From Salmonella to Campylobacter and Giardia, the list is long and includes diseases that can be fatal. A backflow preventer can help protect your family from these dangerous contaminants and save you a fortune in medical bills and lost productivity.

What kind of backflow preventer do I need?

Backflow preventers are designed to protect your drinking water from contaminants, but you have to take the necessary steps to keep them working. If you don’t have one, backflow can easily enter your system and contaminate your clean water with harmful pollutants and bacteria like Salmonella, Campylobacter jejuni, and Cyanobacteria. Backflow preventers are the one-way valves that stop this problem and keep your water safe. They’re crucial for protecting your family from these diseases, but they’re not easy to install and maintain. Follow these simple tips to get yours in tip-top shape.

First and foremost, shut off the main water supply to your property. This will prevent backflow from entering the plumbing systems and contaminating your clean water. Once you’ve turned off the water, remove the cover from your backflow preventer and check for test cocks. These are used to test the backflow preventer, and they must be numbered. Make sure to label the test cocks as well so that you know which ones are testing and which are inoperative.

There are several different types of backflow preventers, but a pressure vacuum breaker assembly (PVBA) is the most common and least expensive type. It consists of an inlet shutoff valve at the bottom, a pressure vacuum breaker and two test cocks in a single valve body, and an outlet shutoff valve. It is also the most widely used backflow preventer on residential irrigation systems.

Dual check valves are more comprehensive than PVBAs and can also protect against backsiphonage, backpressure, and chemical backflow. However, they’re not as effective in high-hazard situations.

Reduced pressure principle (RPZ) backflow preventers are the most comprehensive and dependable type of backflow preventer, but they’re also one of the most expensive. They’re able to protect against all types of backflow, including corrosive chemicals and lethal hazard contaminants like radioactive material or raw sewage.

RPZ backflow preventers are typically installed underground in vaults or basements, and they require a foot of clearance underneath for maintenance purposes. They also use a pressure differential release valve to separate two independent spring-loaded check valves and are used in industrial buildings, commercial or high-occupancy facilities like apartments and hotels, and municipal water systems.

How do I install a backflow preventer?

In order to properly install a backflow preventer, there are two main considerations: hydraulic conditions and mechanical conditions. Hydraulic conditions have to do with the sizing, pressure and temperature of the system into which the backflow preventer is being installed. This is especially important in situations where a backflow preventer will be installed into an existing piping system, as this may have a significant impact on the overall workings of the piping arrangement.

A backflow preventer helps to protect our water supply by keeping contaminated backflow out of the water we drink, shower in and wash with. This is because backflow can bring contaminated water into the clean, treated city water that is piped in to our homes and businesses. When this occurs, it can contaminate our drinking and cooking water with harmful germs and bacteria.

This is the primary reason why many communities require that backflow preventers be installed on all irrigation systems, as well as fire protection systems. Backflow can cause the stagnant water that fills fire protection system pipes to mix with the clean, ‘potable’ city water that flows into buildings and homes. This contaminates the drinking water with germs and bacteria and makes it unsafe for consumption or use in your home, business or industrial facility.

When installing a backflow preventer, it is critical to make sure that it is located above ground. This is because it is very difficult to get to and maintain a backflow preventer that is below ground. In fact, the best practice is to install a backflow preventer so that it is at least five feet off the ground.

Backflow prevention devices also need to be placed where they are easily accessible for testing, inspection and maintenance. This is because the components of a backflow preventer can be very complex and must be tested, cleaned and maintained on a regular basis. For this reason, it is best to place them where they can be easily accessed and where there is ample room around them for efficient testing, cleaning and maintenance.

If you are installing a backflow preventer in an existing underground piping system, then it is recommended that you consider the installation of a protective enclosure. This will help to shield the device from tampering and harsh environmental conditions. You should select an enclosure that complies with ASSE 1060 standards to ensure that it has the necessary locking mechanisms, adequate drainage and can keep the proper temperature.

Gas Piping Inspections Every Four Years

Pursuant to Local Law 152 of 2016, every four years on a set schedule, all buildings that have gas piping must be inspected by a qualified person. These inspections are conducted by Licensed Master Plumbers or persons working under their direct and continuing supervision.

Gas Piping Inspections

Buildings that do not have gas piping systems must submit a Certification (from a registered design professional*) declaring that they contain no such system. This is submitted through the DOB GPS2 submission portal. Contact NYC Gas Piping Inspection for more information.

As a property owner or manager, you likely have a gas line running through your building. That line needs to be inspected on a regular basis in order to prevent leaks, which can cause fires and explosions. The Department of Buildings (DOB) requires certain properties to undergo inspection on a set schedule. Local Law 152 of 2016 requires inspections for buildings with gas piping systems. This requirement is to ensure the safety of building occupants, neighbors, maintenance staff, and city first responders.

The rule applies to all buildings except one and two-family homes and those classified as Occupancy Group R-3. That amounts to about 280,000 buildings throughout the city. The rule states that the gas piping system must be inspected by a Licensed Master Plumber (LMP) or an individual working under an LMP.

During the inspection, the engineer will check for the following conditions. If any of these are present, the building owner must take action:

After the LMP completes an inspection, he or she will submit to DOB a Gas Piping System Periodic Inspection Certification (GPS2) through DOB’s online portal. This report must be signed and sealed by the LMP who conducted or supervised the inspection. Within 60 days after the inspection, the owner must also submit to DOB a list of conditions that require correction.

If any conditions identified in the GPS1 need to be corrected, the building owner must correct them in compliance with Construction Codes and obtain any required work permits. The LMP must notify the owner, the utility that provides gas service to the building, and DOB of any unsafe or hazardous conditions observed during the inspection.

If the inspector determines that the gas piping is in good condition, the building owner must submit to DOB a statement confirming that no work was performed on the gas piping system during the inspection. DOB will then send a notice of approved inspection to the owner and the utility. The building owner must retain a copy of the approved inspection record for 10 years.

The Engineer Checks Your Pipe

During your inspection, the engineer will examine the piping to look for any signs of corrosion, pitting, leaking joints, loose or disconnected piping and any other potential issues. These items can be very dangerous, and should always be addressed immediately. If the inspector finds any problems, they will write up a report with suggestions for repairs or corrections.

Once the inspector completes their work, they will send you a copy of the GPS1 report via email or fax. You will then have 60 days to file your GPS2 report online through the Department of Buildings’ online certification submission portal. Failure to submit your report by the deadline may result in a fine of up to $10,000.

A building owner who is unable to comply with the reporting deadlines can request a 180-day extension by using DOB’s online portal. Once the extension period expires, you will need to submit another GPS2 report to DOB and have your piping inspected again.

In order to perform a LL152 inspection, your inspector must be a licensed master plumber (LMP). You can find a list of LMPs on DOB’s website, or you can use the Master Plumbers Council’s Know Your Construction Professional tool. You can also check for disciplinary action and voluntary surrender records on DOB’s website.

If you are unsure whether your property needs an inspection, or you have questions about how to proceed, feel free to give us a call.

The Engineer Checks Your Appliances

If you’re a landlord, it’s important to make sure your gas appliances and pipework are up to scratch. During a gas safety check, a Gas Safe registered engineer can spot issues that could be dangerous or unsafe for your tenants. This includes carbon monoxide poisoning (CO), which can occur when a gas appliance doesn’t burn properly, or when flues, vents and chimneys become blocked.

CO is a deadly gas that can’t be seen, tasted or smelled, but it can cause headaches, dizziness and nausea in some people. It can also lead to unconsciousness and even death, and the best way to protect yourself is to have your appliances checked regularly by a qualified Gas Safe registered engineer.

A faulty appliance or damaged pipework can produce dangerous levels of CO, so it’s vital that you have them professionally inspected and serviced by a registered engineer every year. This will help to reduce the risk of an explosion or fire in your property, and it’s a requirement by law for landlords who let properties with gas appliances.

During an LL152 inspection, the engineer will check all of your gas appliances and the associated pipework to make sure they’re in good condition. They’ll also inspect your gas meter and the location of any gas barrels, and ensure there’s proper ventilation in the area where you keep your gas equipment.

The next step is that the engineer will look for any obvious damage or signs of a leak to your gas pipework, and they’ll use a pressure test to check that all of your pipes are tight. Ideally, they’ll also look for any loose connections on your appliances and check whether any are fitted incorrectly or have been damaged.

Once the inspector has completed the inspection, they’ll send a GPS1 Gas Piping Periodic Inspection Report to you. It’s your responsibility to file the report with the city Department of Buildings, and you can do so online for free. This process is designed to prevent accidents or other problems that could result from a faulty gas system, and it can help protect you from hefty fines.

The Engineer Checks Your Meter

Whether your building is required to have its gas line inspected under Local Law 152 or for another reason, you can’t afford to take chances. Problems with gas piping can lead to poor air quality, fires, or even explosions. That’s why the city requires that all buildings have their gas lines inspected by qualified professionals.

Gas piping inspections are required by the city every four years on a set schedule. This ensures that the piping is safe for building occupants, neighborhood residents, and city first responders. If a condition is found that could be hazardous, the inspector must notify the owner, utility company, and the DOB.

The inspection process typically begins with the examiner removing your meter and taking it away for testing. Once the meter is returned, you will be given a determination, which tells you whether your meter is working within legal limits or not. If the meter is not working correctly, it will need to be replaced by the energy supplier.

If your meter is not displaying the correct values on its screen, it is likely due to a wiring error. This could be caused by a lack of proper commissioning testing, a misprogrammed VOLTS MODE setting, or the incorrect PT and CT ratios. Incorrect wiring may also produce erroneous W, VA, and VAr values. In most cases, these errors are caused by incorrect polarity on the meter’s load connections.

To make sure your meter is properly wired, you should check the meter installation specifications for details on where to connect the load current probes and the reference voltage terminal block. You should also physically verify the meter’s CT size markings and document the CT ratio. Finally, you should make sure the meter circuit is protected by a fuse or circuit breaker suitable for the maximum meter circuit current.

Once the LMP has completed the inspection, he or she must provide the owner with a Gas Piping System Periodic Inspection Report. If the inspection reveals conditions that need to be corrected, the LMP must submit to the DOB a GPS2 Certification signed and sealed by the LMP who conducted or supervised the inspection (or a qualified individual working under the supervision of an LMP). In addition, the GPS2 must be submitted through DOB’s online portal.

Types of Materials Used in Plumbing

Apex Plumbing is a system of pipes, fixtures, and other devices that convey water for various purposes. Its most important functions include delivering potable water, removing waste, and heating and cooling buildings.

Plumbing

Plumbers often work with heavy machinery and tools, and they must be comfortable working in cramped spaces. They also need to understand building codes and regulations.

Brass is a type of alloy mostly composed of zinc and copper. It is a very soft metal, and it can be easily manipulated into intricate designs and patterns. This makes it a very versatile material that can be used for many different purposes. It is also a very durable material, and it can withstand the harshest of conditions. Additionally, it has a very appealing reddish tint that can complement the décor of any home or building. This makes it an ideal material for plumbing pipes, as it can add a nice aesthetic to the entire system.

The proportion of copper and zinc is adjusted to create different types of brass alloys. The most basic brass is made of 33% copper and 67% zinc, but the composition can vary depending on the desired properties of the alloy. Lead is sometimes added to improve the machinability of the brass. In addition to its good machinability and corrosion resistance, brass has excellent conductivity and toughness. It can also be easily shaped and formed into different shapes, which is useful for the manufacturing of pipe fittings.

One of the most popular uses for brass is in the production of tubing and flanges. Brasses with high copper content are softer and golden in color, while those with less copper and more zinc are harder and silvery in color. These different alloys have a variety of uses, including gears, locks, bearings, bullet casings, and plumbing (like brass fitting).

Plumbers and construction experts frequently use brass pipes for their dynamic properties. They are more robust, flexible, and corrosion-resistant than other materials. They also have a tonne of malleability, which makes them easier to alter than steel or iron tubing. This is an important attribute because it can help reduce labor expenses.

The process of producing brass is a lengthy and complicated one, but it can be broken down into several steps. First, the brass is melted in a large pot or furnace and allowed to solidify into slabs called cakes. Once the slabs are cool enough to touch, they are placed in a rolling mill and rolled at a lower temperature. This lower temperature allows the brass to be formed into various shapes, and it also helps control the grain size and homogenize the alloy.

Polypropylene

Polypropylene is a versatile plastic material used in a wide range of applications. It can be used in the manufacturing of products, such as chemical bottles and microwave safe trays, as well as building and automotive parts. It is also useful in industrial settings, where it can withstand high temperatures and impacts.

It is also a good choice for pipe systems, such as those in chemical processing plants or utilities. It is resistant to chemicals and abrasions, making it a durable material for piping systems that need to be resilient against impacts and harsh environments. In addition, it does not conduct electricity, which makes it a good choice for use in sensitive applications.

There are several methods for fabricating polypropylene products, but injection molding is the most common method. The molders use a variety of injection tools and temperature controls to optimize the process for maximum efficiency. Injection molding is a fast and effective manufacturing technique, allowing for a greater output with minimal cost. Polypropylene’s excellent melt flow index and low viscosity make it easy to mold, even in larger sizes.

In addition to the ease of molding, polypropylene’s good strength-to-weight ratio and good resistance to corrosion make it a great option for pipes. The material is also non-toxic and easy to recycle, which helps to reduce waste. In addition, it is a safer alternative to metal pipes, which are susceptible to corrosion and can contain harmful bacteria.

Polypropylene possesses good resistance to acids and bases, so it can be used to transport industrial streams between processes. It is often tinted black or gray to decrease the ultraviolet (UV) degradation of the pipes and their contents. The piping system is also ideal for handling caustic streams, such as those from potassium hydroxide and sodium hydroxide solutions.

Polypropylene is a highly recyclable polymer, and it is commonly used in food packaging, such as medicine bottles and microwave safe trays. Its ability to withstand high temperatures and impacts means that it is also used in industrial manufacturing applications, such as car parts and battery casings. It is also used for household and commercial water pipes, where it is known for its durability and cost-efficiency.

PVC

PVC is one of the most popular piping materials on the market today. It first started to be used in drain-waste-vent piping (DWV) around 1935, but it quickly grew in popularity. This is because PVC is durable, safe, and cost-effective. It is also easy to work with, making it a great choice for a variety of projects. From building drainage systems to encasing electrical cables, this versatile material has many uses.

Unlike metal pipes, PVC is resistant to corrosion. This makes it a great choice for residential and commercial plumbing applications. It is also safe to use in drinking water lines, as it doesn’t leach chemicals into the water. Moreover, it’s a more affordable option than copper and brass pipes.

Another benefit of PVC is its low weight. It is much lighter than most other plastics, which can make it easier to maneuver and transport. Additionally, it can withstand high temperatures and pressure without warping. This makes it a good choice for industrial environments where the temperature can fluctuate.

In addition to its durability and versatility, PVC is easy to recycle. It can be recycled several times over, and the process doesn’t affect its technical properties. Additionally, its leak-free fittings reduce water loss and energy consumption, which helps cut down on utility bills.

Despite its benefits, there are some downsides to using PVC. For example, the manufacture of this material involves chlorine. Chlorine is a toxic substance that pollutes the environment. It is the main ingredient in CFCs, which ruined the ozone layer. It is also linked to diseases like cancer, diabetes, and reproductive problems.

Another downside of PVC is its tendency to degrade over time. It can degrade in a few ways, including becoming brittle and cracking. While these issues aren’t as serious as they once were, they still pose a problem for some homeowners. While it isn’t ideal for homes, it is still a safe and affordable option for many businesses and industries. In addition, it is also highly durable and works well for underground plumbing. This makes it an excellent choice for earthquake-prone areas.

ABS

Acrylonitrile butadiene styrene, or ABS, is one of the most versatile plastics available. It is strong, lightweight and can be easily fabricated into many different shapes. It also can be painted, glued and sanded. However, it is important to use the right tools for working with this material. In addition to the basic plumbing supplies, a good set of tools should include a tape measure, backsaw and miter box, hacksaw or pipe (tube) cutter, a deburring tool or emery cloth, and a marker for measurements.

The most common use of ABS is in drain-waste-vent (DWV) pipes, but it can be used in other applications too. It is especially useful for plumbing under the ground, because it will not rust or break down over time. It is also resistant to cold temperatures and is ideal for locations away from direct sunlight.

Unlike PVC, which requires two steps to make a connection, ABS pipes are quickly bonded with a special cement. This means that the process is much quicker, which can save a lot of time and money for your business.

Aside from the speed and ease of installation, ABS pipes are also a great choice because they are strong and durable. They can withstand many different types of pressure and are designed to last for years. Moreover, they are very easy to clean, making them a good choice for plumbing under the sink.

Another advantage of ABS is that it will not corrode in the presence of acids and other chemicals. It is also less expensive than many other types of pipe. However, before installing this type of pipe, check with your local plumbing code to ensure that it is compliant.

While it is possible to join ABS and PVC pipes together, this is not recommended and may be against your plumbing code. It is better to use a transition coupling or a stainless-steel clamp to connect the pipes. This will help avoid a leak and reduce the chances of contamination from toxic substances. In addition, using PVC glue on ABS will reduce its pressure rating.

The Importance of Proper Oil Disposal

Whether due to careless mechanics dumping oil in drainage ditches or home cooks pouring cooking grease down drains, waste oil can cause harm to the environment. It seeps into the ground and contaminates water systems, poisoning wildlife and threatening human health. Improper oil disposal is illegal and can lead to hefty fines. It also contributes to severe clogs in sewage and plumbing systems.

Oil Disposal Perth extends the life of the fluid and avoids the release of a pollutant into the environment. It also saves valuable resources. For example, just two gallons of used oil generate enough electricity to run a household for 24 hours. Used oil can be recycled into lubricants and fuel oils and processed into raw materials for the refining and petrochemical industries. It can also be used as scrap metal, in high demand for the steel industry.

oil disposal

Re-refining is a complex process that separates the soluble and insoluble contaminants from the used oil. In addition to removing contaminant particles, re-refining also removes additives and water. This makes the re-refined oil suitable for use in vehicles and equipment. Re-refined oils have a much lower carbon footprint than virgin lubricant oils. The re-refining industry is well-positioned to benefit from the current preoccupation with sustainability. Its process is closed-loop, reducing the need to import base oils. The industry’s re-use of a renewable resource contributes to global goals for carbon neutrality.

Unlike traditional recycling, which cleans contaminants from used oil and replenishes the additives, re-refining is a more advanced process that involves chemical processing, filtration, and distillation. The heaviest material is vaporized and condensed to separate different products. The resulting oil is lighter and purer than the original product. It is then divided by weight and re-processed to produce the final product. This process makes the re-refined oil more durable than the original.

Because the process is complicated, it’s important to choose a reputable re-refiner. The best re-refiners have extensive experience and offer comprehensive service. They also employ a team of experts to help them meet industry standards and compliance requirements. They also promote their re-refining capabilities to encourage the use of recycled lubricants.

Despite the advantages of re-refined oils, many large blenders are reluctant to buy them. This may be because they are under pressure from investors and pending regulations to reduce their Scope 1 and 2 emissions. In addition, they may have been misled by the claims of some re-refiners that their oils are not as good as virgin ones.

Burning spilled oil is an effective and relatively fast way to reduce the environmental impacts of a marine oil disaster. However, incomplete combustion results in sooty smoke that can impact air quality and leave behind oily residues on the water surface. EPA experts are working with BSEE to improve burning techniques during oil response operations. This research includes testing new methods to allow for more complete combustion and reduce air emissions and residuals.

If you must dispose of waste oil, use a metal can or plastic container (e.g., empty milk carton or original oil bottle) to safely convert the oil to trash. Also, mix the waste oil with absorbent materials (e.g., sand, flour, or cat litter) to prevent the oil from being blown away by the wind.

Many people throw away used cooking oil without a thought, usually by pouring it down a drain. This is a bad idea because it can clog pipes and damage water and sewer systems. It also can attract pests and contaminate the environment. To avoid this, you should always dispose of your used oil properly, especially if you run a business that uses lots of cooking oil. You can use a commercial grease trap or contact waste removal services to help you.

Disposing of waste oil is more complicated than dumping it in a landfill. It falls under regulated waste products and has to be handled by the regulations set by government bodies. It cannot be discharged into public sewers or tipped on land, and you have to have a license and a permitted hazardous waste incinerator to burn it.

Most businesses that generate waste oil will recycle it. This conserves resources and reduces waste, and it is a better option than dumping it in landfills. You can recycle oil from car engines, lubrication equipment, refrigeration systems, and other petroleum-based products. You can also recycle oil-soaked rags and sorbent materials.

The two primary methods of managing waste oil are re-refining and burning for energy recovery. Re-refining is the preferred method because it preserves limited oil resources. However, some waste oils can’t be re-refined, such as the settled solids from the bottom of an oil tank or the cleanup residue from a product spill. In these cases, burning the waste oil for energy recovery is the best option. You should always check with your local hazardous waste program for more information on how to manage these types of waste.

Oil recycling is a great way to prevent environmental pollution and save natural resources. In addition, it can help reduce the amount of waste that is sent to landfills. It can also be used to create fuel for vehicles and generators. However, proper disposal is very important. Used oil should never be dumped into the streets or drainage systems, and it must always be stored in a container with a tight lid.

The most popular method for oil recycling is re-refining. This process returns the oil to its original state and can be done continuously. This type of recycling can be very effective, especially when combined with evaporation and thermal decomposition.

Another common method for recycling oil is burning it. This is very effective, but it can cause a lot of air pollution if it is not carried out properly. To prevent this from happening, it is necessary to have a permit and a hazardous waste incinerator.

Some people may pour their used cooking oil down the drain, but this is dangerous and can cause clogs. It also harms the water and sewer systems because it can attract critters, especially rodents. It is much better to place it in a trash can that is sealed tightly or even in the compost pile.

It is also very important to recycle the oil filters that go with your vehicle. You can find these at most auto service establishments and certain retail establishments that sell many automotive fluids. You can also check your local waste management site to see if there is a program that collects and recycles motor oil.

If you are a Do-It-Yourselfer, you can recycle your used cooking oil. Ensure you use a leak-proof container to store the oil and don’t mix it with other liquids such as antifreeze. Then, please take it to your local waste collection facility for recycling.

What Is Water Quality Testing?

A qualified lab does Water Quality Testing Colorado to measure the concentration of harmful contaminants. Those contaminants include germs and chemicals such as lead, arsenic, mercury, and radium.

Water Quality Testing

Tests such as dissolved oxygen (DO) and conductivity are important for monitoring changes in water quality, especially those that occur over time.

Water testing procedures help ensure that the water used in industrial processes or as a drinking water source meets strict parameters set by local governments. These parameters are often based on laws regulating safe levels of specific contaminants. Water testing involves a range of tests to determine the physical, chemical, and biological characteristics of water. This includes sampling techniques, physical and chemical parameter measurements, laboratory analysis, and data interpretation.

A core physical water quality parameter is electrical conductivity. Conductivity indicates the concentration of inorganic and organic substances dissolved in water, including salts, minerals and other compounds. It also helps in determining the presence of a toxic heavy metal such as lead, mercury or arsenic. It is also useful in assessing the state of water’s temperature, which influences odors, chemical reactions and solubility.

Another physical parameter is turbidity. This is a measure of how much clay, silt or other fine particles are suspended in water. It also serves as a marker for the presence of pathogens and bacteria. Water with high turbidity readings may appear cloudy and opaque. To measure turbidity, the water is usually run through a sensor/meter known as a nephelometer and measured in Nephelometric Turbidity Units (NTU) or Formazin Turbidity Units (FTU).

Other physical parameters include pH, acidity, alkalinity, chlorine, hardness and dissolved oxygen. The latter indicates how much oxygen is available to water organisms and, if low, it can indicate the existence of organic contaminants that deplete the dissolved oxygen. Nutrient testing is essential to detect excess levels of nitrates, phosphates and other nutrients that promote excessive algae growth and deplete the dissolved oxygen, leading to harmful conditions called eutrophication.

Biological parameters can detect the presence of harmful bacteria, viruses and parasites that can cause diseases such as cholera, typhoid fever and infectious hepatitis. For example, fecal coliform bacteria serve as indicators for fecal contamination and can be indicative of human or animal waste. Viruses are another indicator of potentially harmful microorganisms in water and are tested using a specialized viral detection test.

Chemical Parameters

The chemical water parameters measure characteristics that reflect the environment with which water comes into contact. They include a number of measurements like pH levels, hardness, dissolved oxygen, biological oxygen demand and total dissolved solids. These parameters are determined by analyzing the samples in laboratories using specialized equipment and techniques. They are then compared with testing standards to determine compliance and identify potential contamination risks.

Some physical water parameters are observed through the senses. For example, the taste of a sample may change or an odor develop as a result of foreign matter being introduced to the water. This material can include organic materials, dissolved gases and inorganic compounds that originate from agricultural, natural or domestic sources. Similarly, the ability of water to conduct electricity, also known as electrical conductivity, is a core physical parameter. This is due to the concentration of ions within a water sample and can be indicative of the presence of other chemicals like salts and minerals.

Another core physical measurement is dissolved oxygen, which can be found in lakes, rivers and streams. It’s important for aquatic plants and animals to have sufficient dissolved oxygen in their environments. When the levels are low, it can lead to stress and even death. Consequently, dissolved oxygen is a critical water quality parameter that must be regularly tested.

Other key chemical measures include pH level, which can tell you how acidic or basic a water sample is. It’s important that the pH of drinking water fall within a healthy range, which is usually between 6.5 and 8.5. Water hardness refers to the amount of dissolved minerals like calcium and magnesium in the sample. This can be a problem for boilers and pipes as it increases the rate of corrosion. Alkalinity, which is the ability of a sample to neutralize acids, is also an essential water quality parameter.

Biological and microbiological parameters can also be measured in the laboratory. These test for things like fecal coliform bacteria, which indicate whether the water has been contaminated with human waste, and indicator bacteria such as E. coli, which can cause diseases like cholera and typhoid fever. In addition, tests can be conducted for nutrients in water. Excess levels of nitrates and phosphates can lead to eutrophication, which depletes the oxygen in a stream ecosystem, leading to toxic algae blooms and causing environmental problems.

Bacterial Parameters

A lot of dangerous waterborne diseases can be caused by bacteria. Some of these include typhoid and paratyphoid fever, leptospirosis, tularemia, shigellosis, and cholera. Bacterial analysis is a key water quality parameter that needs to be measured on a regular basis. It involves taking a sample of the water and filtering it through a flat paper-like disk that has uniform microscopic pores that retain bacteria on its surface while allowing the sample to pass through. The sample is then placed in a petri dish that contains a special culture medium to feed the bacteria.

The results from this are then compared to a standard and can help determine whether the water is safe for human consumption. A high number of bacteria in the water can indicate that sewage, animal waste or other excremental pollution has contaminated the water.

Alternatively, a low number of bacteria can indicate that the water is free from contamination. A high concentration of organic material in the water, such as decomposing weeds and algae, can also cause water to have a foul taste. Chlorine, which doesn’t occur naturally in water, can be added to help remove the odour and taste of contaminated water.

Despite the fact that the majority of harmful contaminants can be removed with the use of effective water pollution solutions, it’s still important to regularly test the water for the various parameters mentioned above. This helps ensure that the drinking water is safe for human consumption and that other natural water sources are free from toxic pollutants, potential biological contaminants and other environmental hazards. Consistent testing also helps identify the source of the contamination and stop it in its tracks before it causes too much harm. This is why federal, state and local regulations mandate certain testing parameters for different types of water sources. It’s up to the water industry to comply with these rules in order to preserve optimal water quality.

Total Dissolved Solids

Total dissolved solids is an important water quality parameter that measures the weight of soluble salts and other inorganic materials dissolved in a given volume of water. In simple terms, the test results tell you how much sodium, potassium, calcium, magnesium, and other inorganic materials are present in the water supply. This measurement is typically a good indicator of a water’s hardness and mineral content. Water with very little dissolved material can taste flat and may have acidic levels that are unhealthy over the long term.

The test itself involves filtering a sample of water, evaporating it, and weighing the solids left behind to calculate the TDS. TDS testing is often performed by laboratory professionals to ensure accuracy and to provide a complete picture of your water. However, it is possible to purchase a device designed to give you a home TDS reading, usually for about $100 or less. While a TDS meter isn’t as accurate as a laboratory test, it can help you determine the presence of inorganic compounds that could affect your health and wellbeing.

Some dissolved substances, such as heavy metals and organic materials, can be dangerous in high concentrations. These pollutants often come from agricultural and industrial runoff that can contaminate lakes, rivers, and streams. In addition, sediments from flooded areas can wash into rivers and streams during a rainstorm and add to the TDS in the water.

When you have a high TDS level, it can make your water taste unpleasant and cause issues with piping and fixtures in your home. It can also mean that there are elevated amounts of trace metals like lead and arsenic in the water, which can be harmful to your health.

Water is a universal solvent, which means it is capable of absorbing many different substances from the environment. The most common substances absorbed by water are minerals, salts, and dissolved solids. A water quality testing company will analyze your drinking water for all of these elements, including bacteria, dissolved solids, and metals. They will then give you detailed information about your water that will help you improve your household’s drinking water quality.

The Importance of Drain Cleaning

Drain Cleaning is a vital part of maintaining your home’s plumbing system. Neglecting drain cleaning can lead to clogged, slow-moving, or smelly drains.

A professional Aurora CO Drain Cleaning company can prevent toxins like bacteria, fungi, and molds from building up in your pipes. However, this service does not solve more serious sewer or drainage issues.

Clogged drains are every homeowner’s worst nightmare, often happening at the worst possible times. Not only do they cause backups, odors, and other problems that can affect your daily life, but they can also lead to expensive and destructive pipe damage. Knowing what to look for and how to prevent and treat a clogged drain can save you time, money, and a lot of headaches.

Most clogged drains are caused by food, hair, and soap residue that builds up over time. Many of these clogs can be prevented by regularly running hot water down your drains after cooking or showering, using a drain cover over bathtub and sink drains, and keeping nearby trees well-maintained and trimmed so they don’t block your drain lines.

Sometimes, a simple plunger or over-the-counter drain cleaner may be all it takes to clear up a drain clog. But if the problem persists, it might be time to call in a professional.

Some clogs are so stubborn that they require more advanced tools, such as a wire drain snake. If the clog has yet to be addressed quickly, it can result in broken pipes that can cost thousands of dollars to repair.

Another great way to keep your drains flowing smoothly is by regularly squirting grease-fighting dish soap down them. This can help dissolve greasy clogs stuck in your drains for too long and will not harm your pipes or the environment.

One of the most common reasons you need to schedule plumbing services is because your sinks or showers are draining slowly. Usually, this is just a minor issue and will correct itself over time. But if you address it, it can avoid becoming a big problem.

Slow drains often happen from clogs. These can be right at the stopper or further down the drain pipe. You can remove some debris using a pair of pliers or a drain snake. However, if the issue is deeper into your pipes or septic system, it might be a more serious problem that requires professional help.

Sometimes, a drain can get so clogged that it stops working completely. If this happens, you might have to use a plunger or chemical drain cleaner. But these can be messy and could be better for your pipes or the environment.

It would be best if you prevented slow drains by cleaning your sinks and tubs regularly. You should also clean your stoppers, which collect hair, soap scum, and other debris. You should also pour hot water down your drains now and then to rinse away some of the grease or oils. It would be best if you also made it a point to clean your garbage disposal regularly.

One of the best ways to prevent clogs is by adding baking soda and vinegar to your routine. This is similar to those volcano science experiments you did in elementary school, but this time, it works. The mixture creates carbon dioxide bubbles that break up clogs and clear the drain. You can use this every week to keep your drains clean. This method is especially helpful if you have a grease-clogged drain since it will dissolve most of the oil and fat. But if your drain is still slow, it may be time to call a plumber. They can perform a plumbing inspection and send a camera down your pipes to determine the cause of the slow drain.

Sewage is one of the most offensive smells in a house. It comes from a mix of inorganic gases that result from the anaerobic decomposition of sewage and sludge. This mixture of gases can contain hydrogen sulfide, ammonia, carbon dioxide, methane, and nitrogen.

Determining where it’s coming from is the first step if a sewer odor permeates your home. The odor could be from a clogged drain if isolated to one room. However, if the smell is carried from room to room, it could indicate a more serious problem with your home’s plumbing.

A dripping sink faucet or a leak in the walls or ground may be the source of the sewage odor. If this is the case, it’s important to act quickly. A leaking pipe can cause severe damage to your home and needs to be fixed immediately.

Another potential cause of a sewage smell is flushing items that should not be flushed down your toilets. Items like baby wipes, dental floss, hair ties, and cat litter can cause septic system blockages if they aren’t properly disposed of in the trash. You can avoid this by only flushing waste and toilet paper down your drains.

Over time, drains can accumulate hair, food scraps, grease, and other debris that cause odors. This can be prevented by regularly cleaning your drains with a baking soda and vinegar mixture or a professional-recommended drain cleaner. You can also add a charcoal-based odor absorber to your drains to neutralize foul odors.

Sometimes, a smelly drain results from a simple mistake made by a plumber or contractor. A common error is forgetting to install or maintain a drain trap or sewage vent. In these cases, the resulting odors can be extremely unpleasant and require immediate attention.

Your home’s sewer line is an important part of your plumbing system. It carries waste and water into your septic tank or to the municipal line in the alley/street. Keeping these lines clear and in good working condition is vital so you don’t experience sewage backups and other problems.

A clogged or broken sewer line can create expensive and hazardous conditions for your home. If you don’t maintain your sewer line, it can become a serious problem that puts your family and pets at risk.

While you can do your best to avoid clogs by avoiding items like grease and feminine hygiene products that aren’t meant to be flushed, sometimes you’ll need help from a professional plumber. If your drains seem to be getting clogged more frequently or you’ve tried plunging and drain cleaner with no luck, it’s time to call the professionals to inspect your sewer line thoroughly.

There are a few signs that it’s time for a sewer line cleaning or repair:

1. Foul Odors: If you notice persistently foul smells coming from your drains, it may indicate a blockage in the sewer line. The smell is from raw sewage backing up your home from the main line. It’s an urgent issue that requires immediate attention.

2. Multiple Clogs: If you’re experiencing clogged drains simultaneously in multiple parts of your home, it’s likely due to a blockage in the main line. The best way to diagnose this is to call in a professional who can use a camera inspection and a special drain clearing “auger.”

3. Cracks or Bellies in the Sewer Line: Aging pipes can crack or develop belly sections that allow solids to build up over time. This can cause them to break or collapse. Regular maintenance by a professional can prevent this from happening.

If you have a tree root intrusion problem, scheduling routine maintenance for your sewer line is also an excellent idea. This will help reduce the number of roots that get into the pipes and cause clogs.

Learn If A Home Business Is Right For You

It can be very exciting to start your own home based business. Many people wish they were their own businesses. This article can provide you with some pointers about running an effective home business.

You should always be willing to take extra steps to leave your customers satisfied. Give them a little gift when they buy something, and let them know that you appreciate their business by thanking them for their orders. Let them know that you are grateful for their business.

It is important to know the cost of production for any product that you sell. Wholesale prices are usually double the price.Retail mark-up is twice the wholesale price.Make your price-point something both you and the customers can live with.

It’s important that you have an office space to work from when running a business from home.It doesn’t have to be big, but it does need to be cozy.

Before starting to sell your products, you should set your price point based off market research. Do not speak badly about your competitors, just focus on playing up your good qualities.

Do not go overboard with communicating too many emails.

Learn all you can about your target market prior to starting any business.If your business includes a website, make sure you know what your targeted audience likes for interaction.

Having a capable website for promoting and selling your products is essential when you run a home business. This gets your product a broader audience that can produce higher sales and bigger profits.

Launching a business enterprise requires you to assume responsibility for all outcomes. In meeting the responsibilities of your home business you’ll also have the potential to reap the rewards for your business success. Diligence pays off for people who operate their own businesses. The tips that you read in this article will set you on the right track to running an enjoyable, successful business.

You can also visit our other websites and post your article.

Giachetti Plumbing, Gold Star Plumbers, Handyman Advantage, Handyman Services By Mike, Hangem High Gutters, Helping Hand Home Improvement, High Country Drywall, Houser Window Cleaning, Insulation Services By Felix, JD Interlock And Landscapes, Jesus Tree Service Landscaping, Joan Lawman Beauty, Kitchen And Bath Remodeling Pros, Mandeville Fiber Glass Insulation, Marios Painting and Handyman, Mount Barker Plumber, My Window Cleaner, New Creation Home Improvement, Oakley Garage Door, Ocean Side Epoxy Flooring, Painter In Hanover, Perfectly Pretty Weddings, Plumbing Heating And Cooling Repair Tips, PM Hauling And Equipment, Portland Metro Plumbers, Precision Cabinetry, Prime-Painters, Provantage Handyman, Radiant Landscape Concepts, Ray Allen Plumbing, Real Lawn Care NC, Richmond Gutter Cleaning Company, Riverside Stump Grinding, Rock Solid Construction TX, Rodriguez Carpentry, Russells Insulation, Santa Ana Flooring, Simply Lawn Service, Strong Rock Masonry, Stump Grinding Pearland, Texas Smart Decks, The Fireplace Service Experts, The Spotless Gutter, Tree Service Victoria, Turbo Clean and More, Vannuys Mold Removal Experts, Weather Defense Roofing, Wenrick Home Improvements, Windward Building Company LLC

What You Should Know About Boiler Installation

Hubbard Mechanical helps with a lot of work. You must clear the hallways and other access points to your boiler room so the installers can get in easily. You may also have to remove the space around your new boiler.

The boiler should be close to water pipes, the flue for ventilation, and electrical outlets. The floor or ground must be level, too.

boiler

If you are replacing an existing boiler, the cost of a new one can vary greatly. The price depends on the size of your home, its location, and the type of heating system you choose. A gas engineer can provide a quote based on your home’s heating survey, including the price of a new boiler and installation costs. It would be best to consider the AFUE rating and the warranty on your boiler. High-efficiency units with a higher AFUE rating can save you money in the long run.

The average cost of a boiler replacement is $3,500 to $5,100. This includes labor, installation, removal, and disposal of the old unit. It’s important to note that this cost does not include ductwork, which is an additional cost. Ductwork can cost anywhere from $3,000 to $7,500 per 300 linear feet.

A new boiler is usually installed in a garage or utility room, but it can also be placed in other locations. It’s best to remember the boiler in a space with easy access for maintenance and repairs. You should also avoid placing a boiler in a cold place like a basement, attic, or crawlspace.

When choosing a contractor, select one with an HVAC license and experience working on boilers. Look for a company with good ratings and reviews, and ask about guarantees or warranties. Getting a written estimate and checking for discounts or special offers is also a good idea.

You can also save on the cost of a new boiler by buying a used one. These machines are less expensive than brand-new models, and you can usually find them at local auctions or in the classified section of local newspapers. It’s also a good idea for homeowners to compare the prices of different manufacturers and brands before deciding.

Another cost factor to consider when choosing a boiler is the fuel type. Most boilers use natural gas, but some run on oil or electricity. A new gas boiler costs slightly more than a comparable electric model because you will need to install a new gas line. The installation of a new oil tank is also an additional cost to consider.

The energy efficiency of a boiler system depends on several factors, including the type and size of the boiler. It is also important to install efficient controls and perform regular maintenance. These steps will help you save money in the long run.

A new, more advanced boiler is often more energy-efficient than older models. This is because they can recover heat previously dissipated through the flue. These boilers are called condensing boilers and are available from many different manufacturers. They cost more than traditional boilers, but they are worth the investment.

Electric boilers are another option for a more eco-friendly home. They are not as expensive to install and don’t require a chimney or gas line. However, they may not be as effective as other options.

When the boiler is activated, a control valve opens to allow gas – natural or propane – into a combustion chamber. The gas is ignited by a pilot light or electronic ignition system and then passes through a heat exchanger. The heat exchanger is connected to a series of water pipes traveling to and from the home’s radiators. An electric pump then distributes the warm water to ensure a consistent temperature.

Investing in a new thermostat that is designed to be smart and can adjust temperatures based on your schedule is a good idea. This way, you can keep your house cooler while you are away and warmer when you return. This will save you a lot of money on your heating bills.

You can do several things to improve your boiler’s energy efficiency, including installing a smart thermostat and adding a vent damper. These additions will help you save money and make your home healthier and more comfortable.

Look for deals from local installers, as these can save you a lot of money. A new boiler is a big-ticket item, so it’s worth shopping around for the best price. In addition, it’s always a good idea to hire a licensed contractor for the installation. This will ensure that the job is done correctly and safely.

Boiler installation is a complex process. It requires the removal of an existing boiler, new pipework, and electric power and thermostat cables. It can take a day or two to install a new boiler. The time will depend on the system’s complexity and installed location. The contractor will shut off the power and water supply to the old boiler before beginning work. This is a crucial step to ensure safety and prevent any accidents during the process. According to local regulations, the contractor will also remove and dispose of the old boiler.

Once the old boiler has been removed, the contractor will connect the water and gas pipes to the new boiler. This will include a new gas connection, supply and return pipes, and radiator connections. The contractor will then test the new boiler and make necessary adjustments to get it running properly. The contractor will also install a control panel for the boiler, which is optional for some models.

You’ll need to be home during the installation to give the engineer access to your property and a run-through of what will happen. You should ensure you’ve showered or bathed before the work begins and have food prepared. It would be best if you also shut down any sensitive electronics that the disruption of a power outage could damage. It would be best to create a staging area for the installer, which may be as simple as a cleared-out room or a drop cloth on the lawn.

Another important part of the boiler installation process is “dressing” the system. This means adding the correct pipes to the boiler system, and this task is done with a wrench. For example, the installer will insert a circular pump directly into the boiler section and then add a riser pipe gasket. After this, the installer will attach each pipe to different areas throughout your home.

When the boiler is finished, the installer will commission it. This process will involve testing the boiler’s water pressure and heating output and ensuring that all safety features work properly. The installer will also provide instructions on using the boiler and answer any questions.

A boiler warranty is a promise from the manufacturer that they will repair or replace your boiler within a specific time frame. The warranty can be different lengths, and some manufacturers even offer extended warranties for boilers installed by their approved installers. However, you should always read the terms and conditions carefully before choosing a boiler.

Boiler warranties are a great way to save money on maintenance and repairs. However, they only cover some things that can go wrong with a boiler. This means getting regular maintenance checks and cleanings from an experienced heating engineer is important. This will prevent small problems from becoming bigger and help you avoid costly repairs.

It is also important to know that the boiler warranty will only last for its full length if you follow the terms and conditions. Registering the boiler warranty as soon as possible after installation is important. The installer can do this, or you can do it yourself. In either case, it is important to ensure that the boiler has been registered so that it doesn’t expire before the end of the warranty period.

A warranty will not cover any problems caused by misuse, neglect, or tampering. In addition, it will only cover issues that result from correct installation or poor artistry. If you have a problem with your boiler, check the papers for the warranty details. These will specify the warranty length, what is covered, and how to file a claim for a repair or replacement.

A new boiler can help you save a lot of money on your heating bills. Getting a boiler installed in your building is a major investment, so choosing a company that offers a quality product and good customer service is important. Look for a company that provides a fixed-price quote online and can install your boiler in less than a day. Also, ensure that the engineer is Gas Safe registered before hiring them. This will ensure the work is completed to the highest standards and won’t invalidate your warranty.

What Do Residential Plumbers Do?

Residential Plumber Chatsworth takes care of plumbing tasks found in homes. This may include the installation of residential fixtures and tackling repairs.

Plumbers

These professionals can also handle clogged toilets and drain lines. However, there are some situations that require the help of a different kind of plumber. The difference between commercial and residential plumbing comes down to usage and size.

Residential plumbers work with plumbing systems inside homes, including pipes, water fixtures, toilets, and drains. They install these systems during new home construction and perform regular maintenance on existing fixtures. This can include clog removal, fixture replacement, and more. Generally, these professionals get their training by working as apprentices to master plumbers and earning a combination of paid on-the-job experience and classroom instruction. Most states require a license for plumbers, though the specific requirements vary from state to state.

Aside from installing and replacing fixtures, residential plumbers also troubleshoot and repair these systems. This includes finding the source of a problem, repairing it, and testing all plumbing components to make sure they’re working correctly. For example, if you have low water pressure, the plumber may need to check the flow rate of individual pipes and the main water supply valve. They might also inspect the drains and sewer lines for leaks or blockages.

One of the biggest differences between residential and commercial plumbing is that commercial plumbers must comply with stricter codes and regulations. This is because they usually work on larger buildings that can house many more people than a single-family home. Additionally, these systems are typically more complex and may have a higher volume of waste than residential systems.

While these differences seem minor, they can have a big impact on the quality of service you receive. For instance, if you have a major plumbing issue in your office building, you’ll want to call a commercial plumber rather than a residential plumber to ensure the problem is addressed promptly and accurately. Otherwise, you might face costly disruptions to your business. Thankfully, there are many experienced and professional commercial plumbers in Indianapolis that can handle all your needs. Just be sure to choose the right one for your unique situation!

They Can’t Handle Commercial Buildings

Residential plumbers are the ones who take care of any plumbing issues that might arise in a house, apartment building, or condominium complex. They’re accustomed to working in one- or two-story homes with a limited number of bathrooms and sinks, so it comes naturally to them to fix any clogged pipes or water leaks that might occur.

Commercial buildings, however, put much more strain on the plumbing system. For starters, there are often more sinks, toilets, and urinals in a commercial space, which means that each fixture is used many times more frequently than in a home. This causes them to wear down more quickly, and it also creates a greater risk for blockages and leaks.

In addition, many commercial spaces have multiple floors, which makes it harder for plumbers to find the source of a problem. If a sink or toilet isn’t draining properly, it can easily be traced back to the water shutoff valve or main water supply line. Finding the problem in a commercial space requires the plumber to search each floor above until they locate it, which can be challenging if the building is high up.

Finally, commercial spaces typically have a variety of different tenants that use the same bathroom facilities. For instance, you might have a hospital, school, or restaurant sharing the same plumbing system. This means that the plumbers who work in these spaces need to be familiar with a wide range of building codes and ordinances that could impact their work.

As a result, residential plumbers aren’t equipped to handle problems in commercial buildings. They may be able to fix some of the more minor issues, but it’s always best to hire a professional who specializes in commercial plumbing services. Choosing the right professional can save you time and money when it comes to fixing a burst pipe or water leak in your business. If you’re unsure of which type of plumber to hire, be sure to ask about their experience and credentials before hiring them. This way, you can rest assured knowing that your property is in good hands.

They Can’t Snake Drain Lines in High-Rise Buildings

Plumbing is more complex than people think, especially when you start talking about high-rise buildings. These structures aren’t just tall; they also have a whole host of different fixtures and piping that need to be checked regularly in order to keep things running smoothly. This is where commercial plumbers come in. They are trained to handle a variety of different plumbing issues and systems that you might find in business environments.

For example, if you have a clogged toilet in your high-rise apartment, it’s likely that the blockage is coming from one of the main drain lines. Using a drain snake would work well in a residential home to break up the blockage, but that won’t be enough when you’re dealing with an entire building of toilets and other drains. Commercial plumbers will be able to use more advanced equipment to clear these more difficult clogs.

Another common problem that can occur in commercial buildings is leaking pipes. These can be caused by a number of factors, including corrosion, age, or just normal wear and tear. Regular inspections by a professional can help you catch these problems early on before they cause serious water damage and expensive repairs.

In addition to detecting leaks, commercial plumbers can also handle other maintenance tasks like replacing water heaters and installing new sinks or tubs. They can even install whole-house filtration systems to make sure that your drinking water is as clean as possible.

When you have a problem with your plumbing, it’s important to call a professional plumber right away. This will prevent the issue from getting worse and will give you peace of mind that your home or business is safe from potential damage. In addition, a professional plumber will be able to provide you with tips and advice on how to avoid future plumbing issues.

If you’re looking for a plumber in Sacramento, contact the team at Express Sewer & Drain. We’re happy to answer any questions you have about our services and can help with any issues you might be facing. Call us today for more information!

They Can’t Detect Leaks

One of the biggest problems homeowners run into is water leaks. Even a small leak can ruin drywall and drive up utility bills. If left unchecked, it can also damage the building’s structure and cause mildew or mold. That’s why it’s so important to find and repair these problems quickly.

While many people think that they can do their own plumbing leak detection, the truth is that it takes professional equipment to find those sneaky little guys. For starters, a plumber can use sound technology to pinpoint the location of a leak without having to break into your home. For example, a plumber can use a ground microphone or listening disc to detect the sound of running water, even if it’s hidden behind drywall or other furnishings.

In addition, a plumber can also use heat detection tools to locate leaks. These tools use infrared to scan for any changes in temperature. If there is a leak, the infrared light will pick up on it and indicate its general location. If all else fails, a plumber can use video equipment to see inside your pipes. This tool looks like a snake with a camera on the end of it. The plumber navigates this tool through your drains and gets a clear view of the issue at hand.

Residential plumbers are well-versed in the installation, maintenance, and repair of plumbing fixtures found in most homes. Their training and expertise allow them to diagnose and fix any issues with your home’s plumbing system, including leaks. Leaks are some of the most common and most damaging plumbing problems, so make sure to call your local plumber right away if you suspect that you have a leak.

A quick call can save you money on your water bill and help prevent further damage to your home. In the meantime, be sure to turn off all faucets and water-using appliances, and check your water meter regularly to keep an eye on your usage. If you notice that your water meter is spinning even when no one is using the faucets, you probably have a leak.